
Windows 11 comes with various pre-installed fonts, but there might be instances where you need specific fonts for certain occasions or to align with your company’s branding. In such cases, you can easily install additional fonts on Windows 11 by following these simple steps:
How to install fonts on Windows 11
1. Begin by downloading the desired font and saving the font file on your Windows PC. Ensure that the font files are in either .otf or .ttf format. You can find a wide range of fonts available for free on websites like dafont, or you can purchase fonts from platforms like Adobe.
2. Once the font file is ready, open the Windows settings by pressing the Windows key + I on your keyboard. Then, click “Personalization” on the left side of the settings window.
3. In the main window, locate and click on “Fonts” to access the font settings.
4. you will find a list of all the fonts currently installed on your Windows 11 system. If you need to search for specific fonts, you can use the search field at the top to quickly find them.
5. Now, the exciting part: click on “Add fonts” at the top of the window.
6. To install the font, drag and drop the previously downloaded font file into the “Drag and drop to install” field and then release the mouse button. Windows 11 will automatically check the file in the background and install the font without providing explicit feedback. Once the installation is complete, the font becomes available without restarting your computer. However, remember that some applications may require reopening before utilizing the newly added font.
7. If you have multiple font files to install, you can conveniently install them all at once. Please select all the font files you want to install, then drag and drop them into the installation window. Windows 11 will install all the selected font files in a single step.
Following these steps, you can easily enhance your Windows 11 experience by installing additional fonts that suit your needs. Enjoy exploring various fonts and customize your documents, designs, and projects with the perfect typography!
Isn’t that even faster?
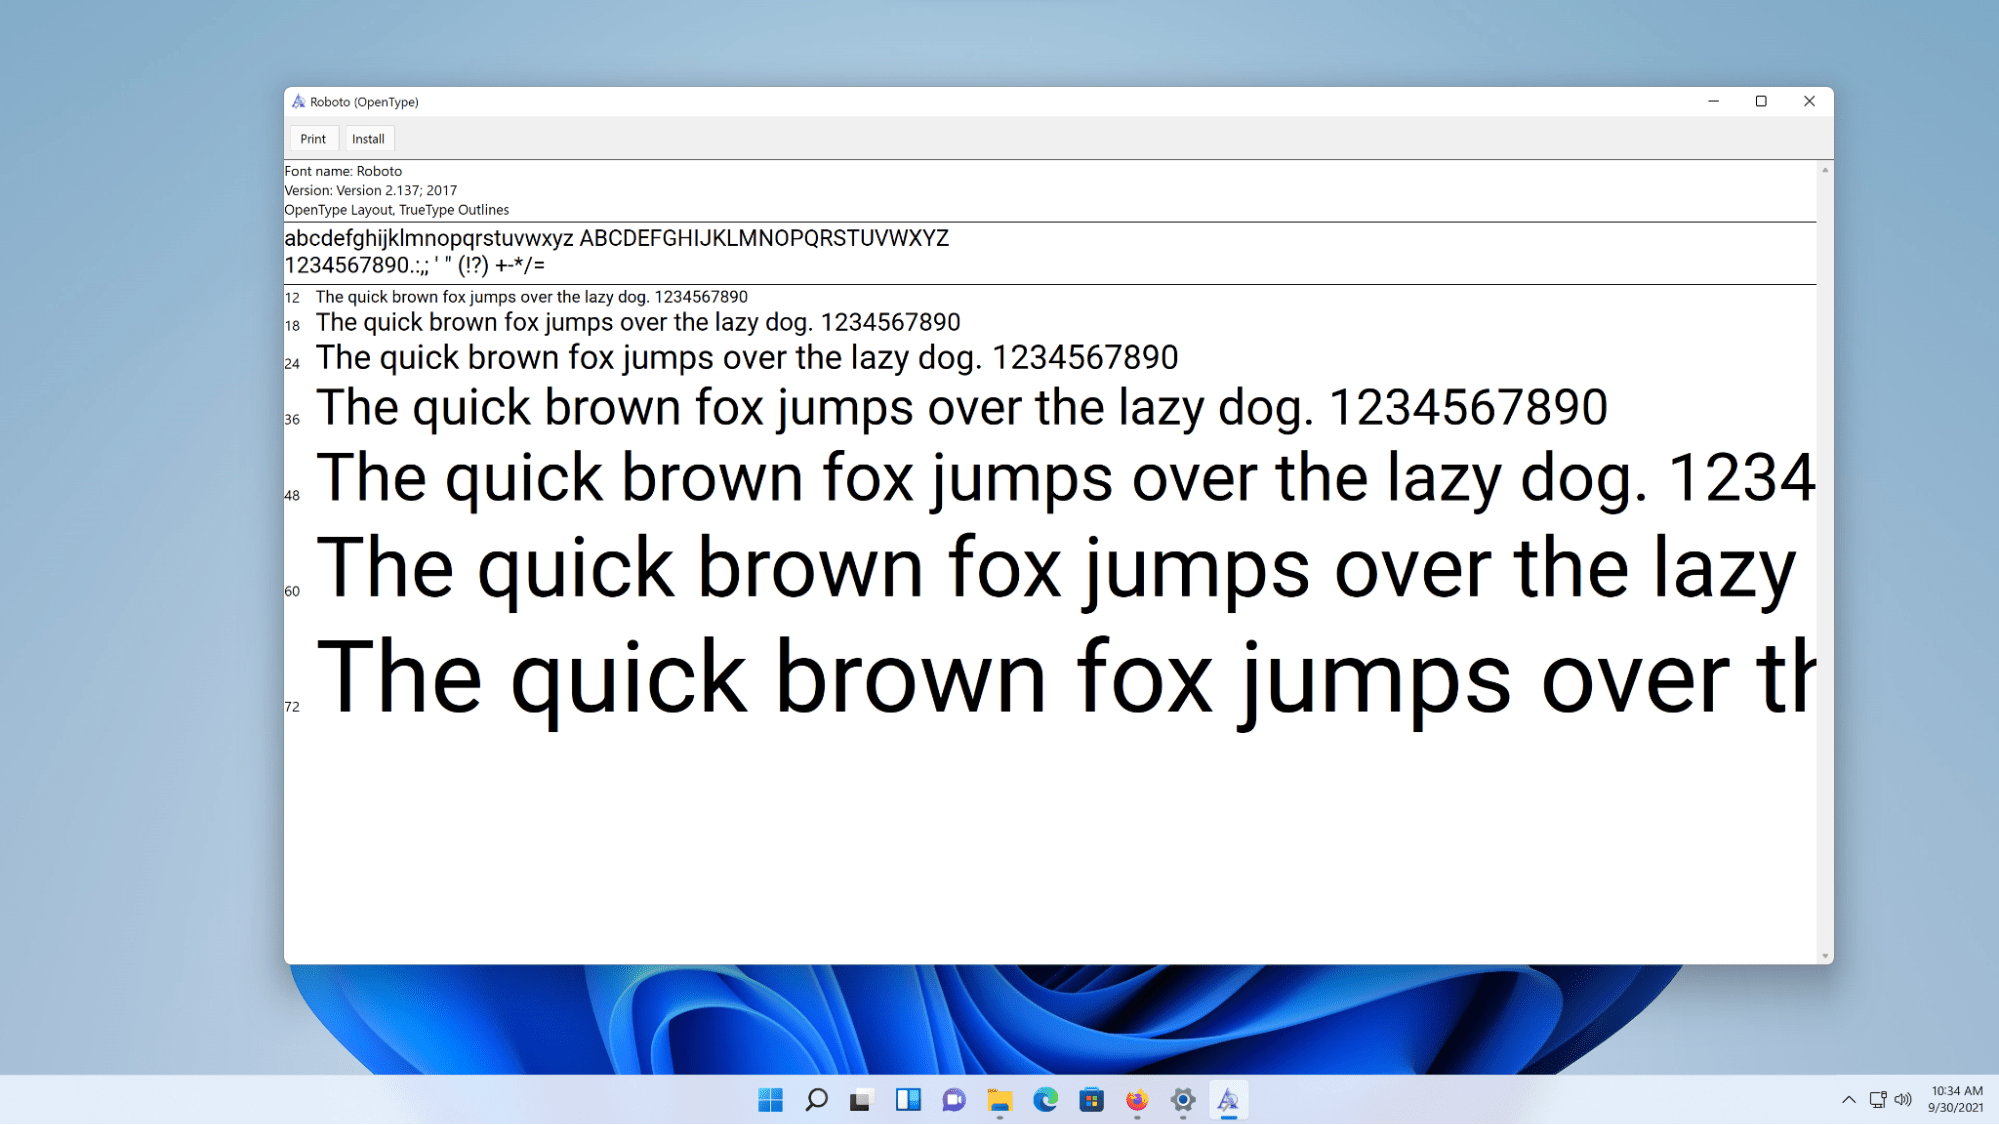
Indeed, there is an even quicker method to install fonts on Windows 11. Simply double-clicking the downloaded font file will initiate the installation process. Windows will display a font preview with sample text in different sizes. You can click on “Install” in this window to proceed with the installation.
You might wonder why we mentioned the previous method first. Well, by going through the Settings and accessing the Fonts section, you can view all the installed fonts in one place. You can also uninstall fonts from there if needed, providing a convenient way to manage your font collection. So, it offers more flexibility and control compared to the quick double-click method.
Uninstall fonts in Windows 11
If you want to uninstall a font again, you can do this in the same place (Settings – Personalization – Fonts). Use the search field to find the font you want to delete, and double-click on the corresponding entry. In the next window, you will find a button, “Uninstall‘ with which you can remove the font from the system.
In addition to uninstalling manually added fonts, preinstalled standard fonts can be uninstalled via this window.


