
Making an electronic game from scratch is no easy feat and doesn’t come cheap. However, some companies have found ways to provide tools that empower developers to unleash their creativity. One example is ROBLOX (available on PC, Android, iOS, and Xbox), allowing users to create and share games within a single environment.
ROBLOX has made the game development process more accessible by giving users a platform to play games and design and build their gaming experiences. This versatile platform caters to gamers and aspiring developers, fostering a community where ideas can come to life and be shared.
Whether you’re a seasoned game developer or just starting to explore the world of game creation, ROBLOX provides a unique opportunity to express your imagination and bring your gaming visions to reality. With its user-friendly tools and collaborative environment, ROBLOX empowers creators of all skill levels to take their ideas from concept to playable form.
How to create a game on Roblox
Creating a simple game on Roblox can be a fun and rewarding experience. Here’s a step-by-step guide, along with an example, to get you started:
Download Roblox Studio
1. If you haven’t already, download and install Roblox Studio from the Roblox website.
2. Open Roblox Studio and log in to your Roblox account.
Creating a New Game
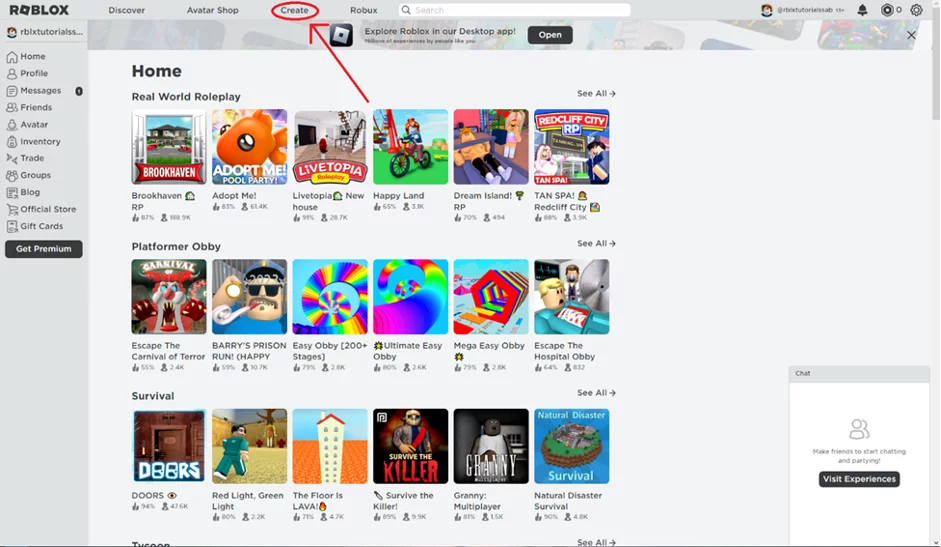
3. Click the “Create New” button to start a new game project.
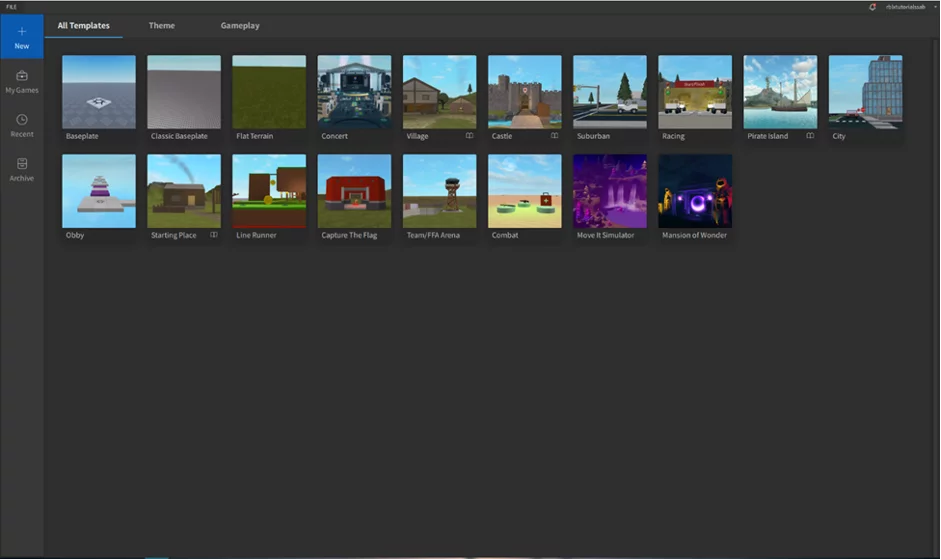
4. You can choose a template to start with or begin with a blank baseplate.
Design Your Game
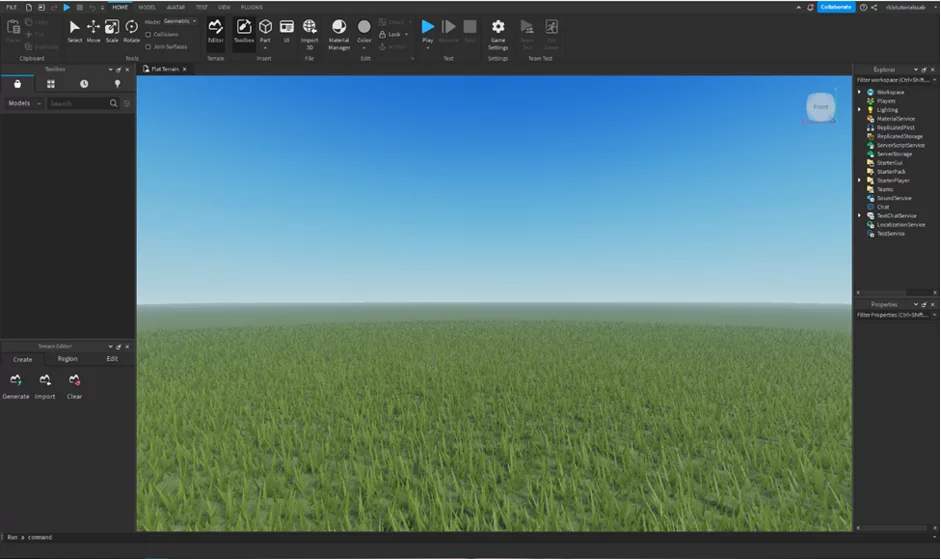
5. Use the various tools in Roblox Studio to build your game environment. You can add bricks, models, terrain, and other elements to create your desired world.
6. Populate your game world with characters, obstacles, items, and decorations.
7. Add scripts to your game objects to give them behavior. Lua scripting language can program interactions, movement, and other functionalities.
Test Your Game
8. Use the Play button in Roblox Studio to test your game. This lets you experience your game as a player and identify bugs or issues.
9. Debug and fix any issues you encounter during playtesting by revising your scripts or adjusting your game elements.
Publish Your Game
10. Once you’re satisfied with your game, prepare it for release by finalizing any remaining details and polishing the experience.
11. Click the “Publish to Roblox As…” button to publish your game to the Roblox platform.
Creating a Simple Obstacle Course Game on Roblox
Let’s create a simple obstacle course game where the player navigates through several obstacles to reach the end goal.
- Design Environment: Use bricks and terrain tools to create a course with platforms, ramps, and obstacles.
- Add Obstacles: Place obstacles such as walls, spikes, and moving platforms throughout the course.
- Character Setup: Insert a character model into your game to serve as the player’s avatar.
- Scripting: Attach a script to the character to control movement. Here’s a basic example of a movement script using Roblox’s Lua:
- Testing: Playtest your game to ensure the character moves properly and can navigate through the obstacles.
- Publishing: Once satisfied, publish your game to Roblox for others to play.
To Create Obstacle Course Game on Roblox
- Open Roblox Studio.
- Click New → Choose Baseplate (this gives you a flat starting area).
- Save your project (
File → Save to Roblox As).
Build the Obstacles
- In the Explorer panel, right-click on
Workspace→ InsertPart.- This creates a block you can resize into platforms, walls, etc.
- Use the Scale tool to stretch it into platforms players can jump on.
- Duplicate parts (Ctrl+D or ⌘+D) to make multiple platforms.
- Add variety:
- Lava blocks: Change the color to red and the material to Neon.
- Jump pads: Scale a flat part and script it to boost players up.
- Moving parts: Add a part
Partand attach a script to move it back and forth.
Add a Kill Block (Lava)
- Insert a new
Part. - Make it red (to look like lava).
- Add a Script inside it:
local part = script.Parent

part.Touched:Connect(function(hit)
    local humanoid = hit.Parent:FindFirstChild("Humanoid")
    if humanoid then
        humanoid.Health = 0 -- Kills the player
    end
end)
Add Checkpoints
- Insert a
Part→ Make it a checkpoint (different color, maybe green). - Add a Script inside it:
local checkpoint = script.Parent

checkpoint.Touched:Connect(function(hit)
    local player = game.Players:GetPlayerFromCharacter(hit.Parent)
    if player then
        local spawn = Instance.new("SpawnLocation")
        spawn.Position = checkpoint.Position + Vector3.new(0, 3, 0)
        spawn.Anchored = true
        spawn.CanCollide = false
        spawn.Transparency = 1
        spawn.Parent = workspace
        player.RespawnLocation = spawn
    end
end)
Add a Winning Platform
- Create a final platform (gold block, for example).
- Insert a Script inside:
local goal = script.Parent

goal.Touched:Connect(function(hit)
    local player = game.Players:GetPlayerFromCharacter(hit.Parent)
    if player then
        game:GetService("StarterGui"):SetCore("SendNotification", {
            Title = "Congratulations!";
            Text = "You completed the obby!";
            Duration = 5;
        })
    end
end)
Test Your Game
- Click Play (or F5) to test.
- Run through your course and check that:
- Lava blocks kill you.
- Checkpoints save your progress.
- The final block shows a message.
Publish to Roblox
- Click File → Publish to Roblox.
- Give it a name, description, and make it Public.
- Share the link with friends!
Remember, this is just a simple example to get you started. Expand and customize your game further with additional features, levels, and polish. Happy game development!


