
Ever Had Color issues on your Laptop or desktop screens. Feels like the color is not accurate or not up to the mark. And wanted those Images, videos, and games to look their best in your display and give accurate output?
That’s Possible by Calibrating your computer Display. Monitor calibration ensures colors and black levels are as precise as you can, and you can do it easily with Windows’ built-in instrument. We are going to utilise the Windows Colour Management settings to stroll through the steps of calibrating your screen.
The measures below are available for Windows 10, however, the calibration application is available in Windows 7 and Windows 8.1. Prior to starting, ensure your monitor was on for half an hour, and clean your monitor.
Calibrate Your Monitor in Windows 10
1. Right-click on the desktop and select Display settings.
2. Click “Advanced display settings” at the bottom of the settings window.
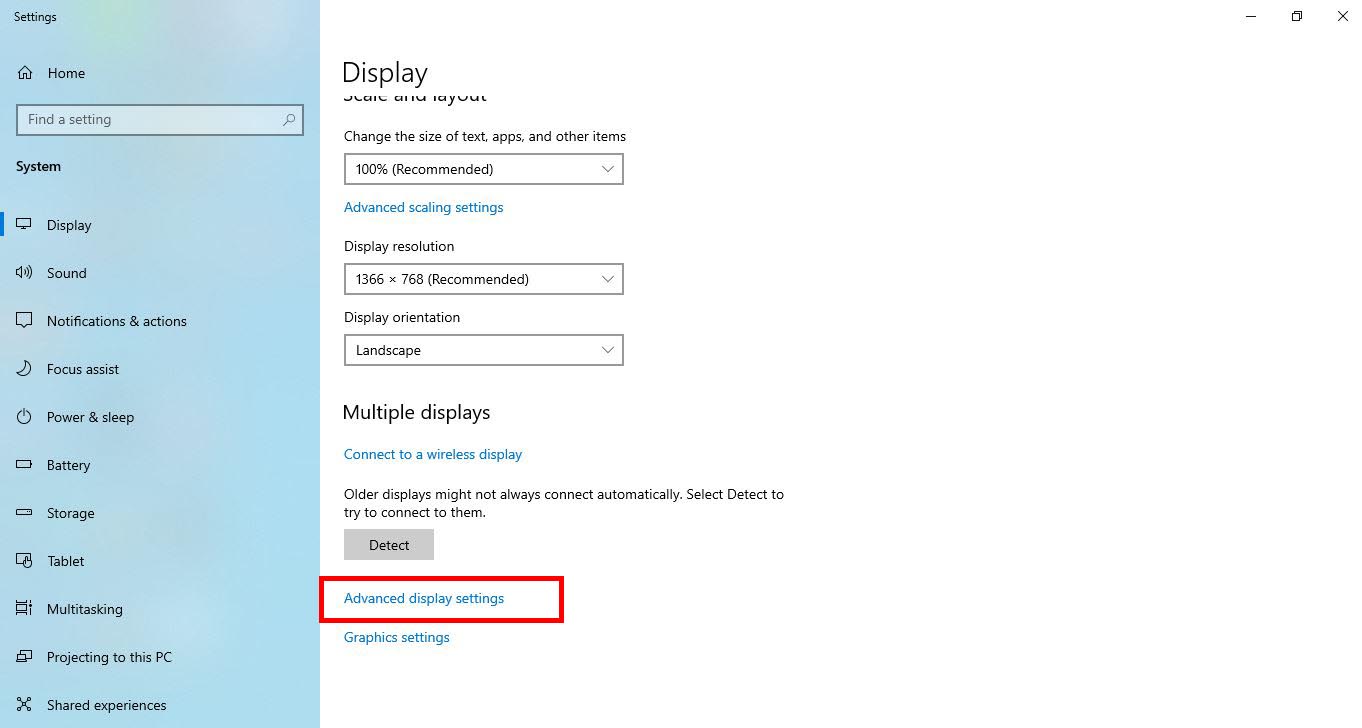
3. Confirm that your screen is set to your recommended resolution. When it is not, place it into the recommended settlement at the least with this calibration procedure.
4. Now Search for “Display ” In the start Menu. You, Will, Get Results Like the image below.
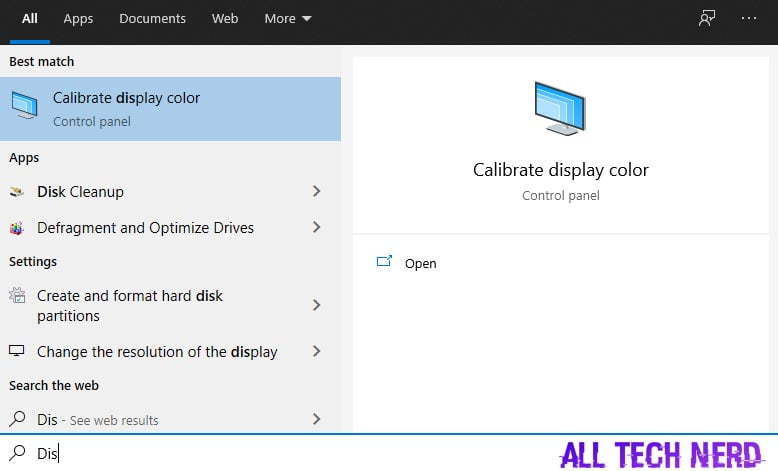
5. Select Calibrate Display Colour.
6. The help wizard will help you through adjusting your colour settings. You’ll be able to perform various actions like:
- Adjust your display’s gamma.
- Set the display to the factory default colour settings.
- Adjust the colour balance
- Adjust the brightness and contrast.
7. Once done with these, click on Finish. Your display will be calibrated for the best. Make all changes while testing the display in real time. This will help you to get the best output.


