
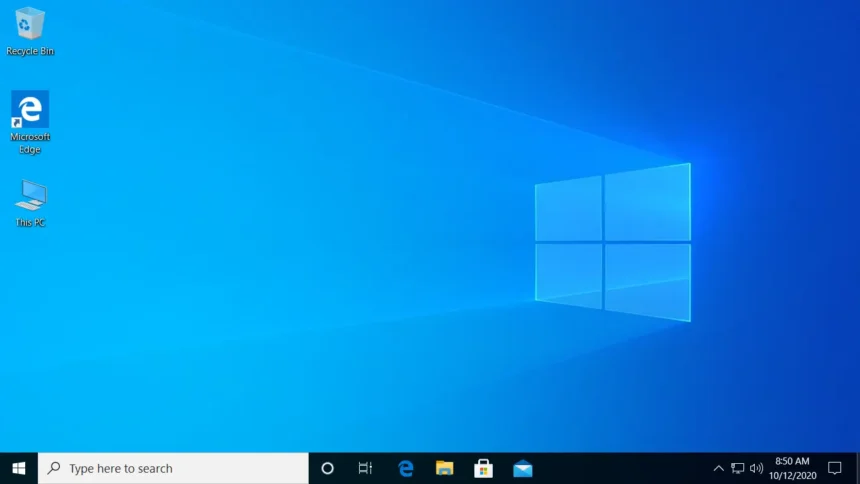
The This PC icon is one of the most useful shortcuts on a Windows computer. It provides quick access to your computer’s drives, connected devices, folders, and storage information. However, Windows 11 does not always display the This PC icon on the desktop by default.
If you recently installed Windows 11 or upgraded from an older version, you may notice that the familiar This PC icon is missing. Fortunately, you can restore it using Windows Settings, create a desktop shortcut, or access it through File Explorer.
In this guide, I’ll show you several ways to get the This PC icon on your Windows 11 desktop, customise its appearance, and fix common problems if it doesn’t show up.
1. How to Get This PC Icon on Windows 11 Using Settings
The easiest way to add This PC to your desktop is through the Windows 11 Personalisation settings. This method restores the original system desktop icon rather than creating an ordinary shortcut.
Follow these steps:
- Right-click an empty area of your Windows 11 desktop.
- Select Personalize from the context menu.
- The Settings application will open.
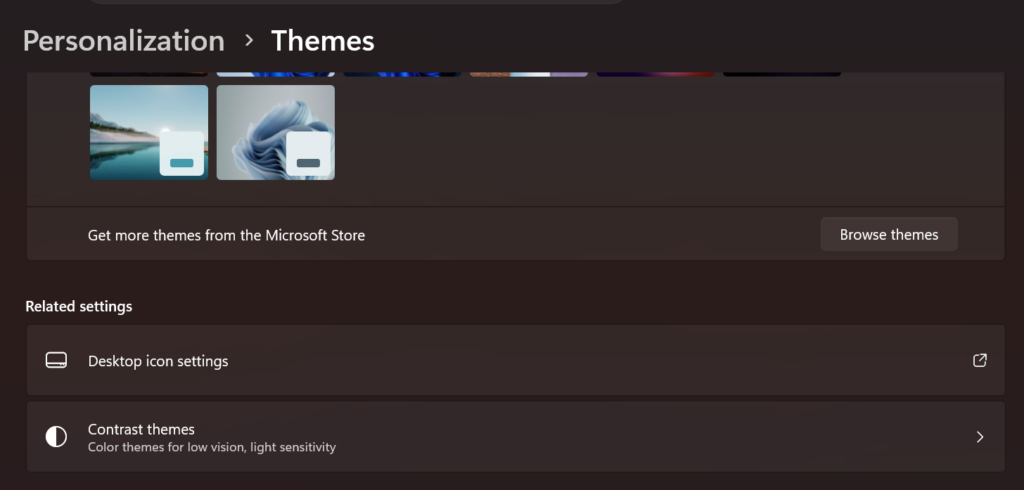
- Click Themes.
- Scroll down to the Related settings section.
- Select Desktop icon settings.

- The Desktop Icon Settings window will appear.
- Find the Computer checkbox.
- Check the box next to Computer.
- Click Apply.
- Click OK to save the changes.
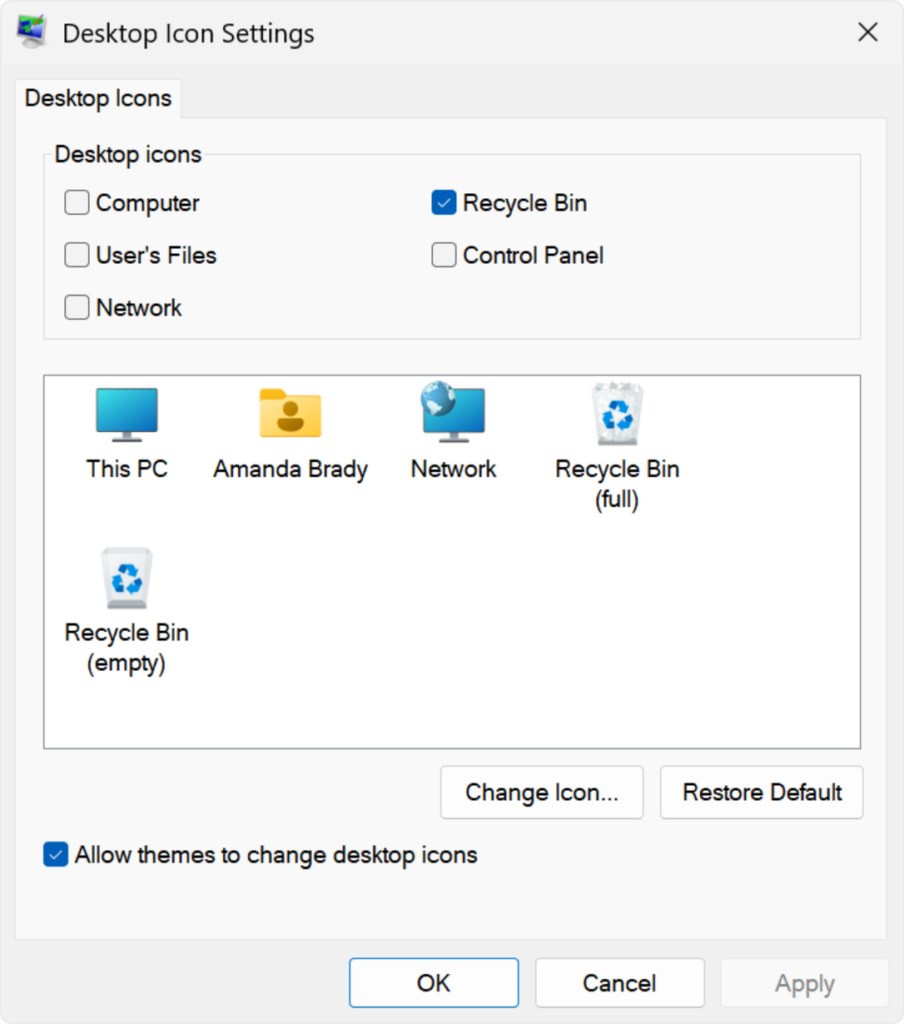
The This PC icon should now appear on your desktop.
Note: In the Desktop Icon Settings window, Windows may label the option as “Computer” even though the desktop icon is displayed as “This PC”.
You can use the same window to display other familiar desktop icons, including:
- User’s Files
- Network
- Recycle Bin
- Control Panel
This is the recommended method because it uses Windows’ built-in system desktop icon.
2. How to Add This PC Icon Using the Run Command
You can also open Desktop Icon Settings directly using the Run dialog. This method saves time because you don’t have to navigate through several Settings menus. Follow these steps:
- Press Windows + R on your keyboard.
- The Run dialog box will appear.
- Type the following command:
desk.cpl ,,5 - Press Enter.
- The Desktop Icon Settings window will open.
- Check the Computer option.
- Click Apply.
- Click OK.
The This PC icon should now be visible on your desktop. This method is particularly useful if you frequently change desktop icon settings or prefer using Windows commands.
3. How to Create a This PC Desktop Shortcut
If the standard desktop icon method doesn’t work, you can create a shortcut manually.
Follow these steps:
- Right-click an empty area of your desktop.
- Select New.
- Click Shortcut.
- In the location field, enter:
explorer.exe shell:MyComputerFolder - Click Next.
- Enter This PC as the shortcut name.
- Click Finish.
A This PC shortcut will now appear on your desktop. Double-clicking it will open This PC in File Explorer.
Important: This method creates a normal shortcut rather than restoring the original Windows system icon. If you want the standard This PC icon, use Desktop Icon Settings.
4. How to Pin This PC to the Start Menu in Windows 11
If you don’t want another icon on your desktop, you can pin This PC to the Start menu for quick access.
Here’s how:
- Press Windows + E to open File Explorer.
- Click This PC in the left navigation pane.
- Right-click This PC.
- Select Pin to Start if the option is available.
You can now open the Start menu and look for the pinned item.
If your Windows version or context menu doesn’t offer this option, you can create a shortcut using the previous method and pin the shortcut where supported.
5. How to Pin This PC to Quick Access in File Explorer
Quick Access, called Home in newer versions of Windows 11, lets you keep frequently used locations within easy reach.
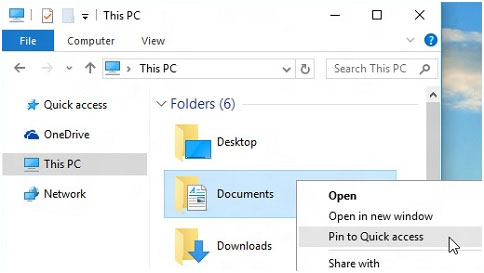
To access This PC from File Explorer:
- Press Windows + E.
- Find This PC in the left navigation pane.
- Right-click it.
- Select Pin to Quick access, if available.
Depending on your Windows 11 version, the navigation area may display “Home” rather than “Quick access”. You can still access This PC from the navigation pane.
6. How to Change the This PC Icon in Windows 11
Windows 11 allows you to change the appearance of the This PC desktop icon.
If you want to use a different icon, follow these steps:
- Right-click an empty area of the desktop.
- Select Personalize.
- Open Themes.
- Click Desktop icon settings.
- Select Computer from the list.
- Click Change Icon.
- Choose an icon from the available options.
- Alternatively, click Browse to select an icon file.
- Click OK.
- Click Apply to save your changes.
Windows supports icon files in the .ico format. Some executable and library files also contain selectable icons.
To restore the original icon, return to Desktop Icon Settings, select Computer, and click Restore Default.
7. How to Rename This PC on Windows 11
If you want to change your computer’s device name, Windows 11 provides a separate setting for that purpose.
- Press Windows + I to open Settings.
- Select System.
- Scroll down and click About.
- Select Rename this PC.
- Enter your preferred computer name.
- Click Next.
- Restart your computer when prompted.
Changing the computer’s device name does not remove or rename the This PC desktop icon. The icon will continue to display as This PC.
8. How to Show Desktop Icons in Windows 11
Sometimes the This PC icon is enabled in Desktop Icon Settings but remains invisible because desktop icons are hidden. You can check this setting using the following steps:
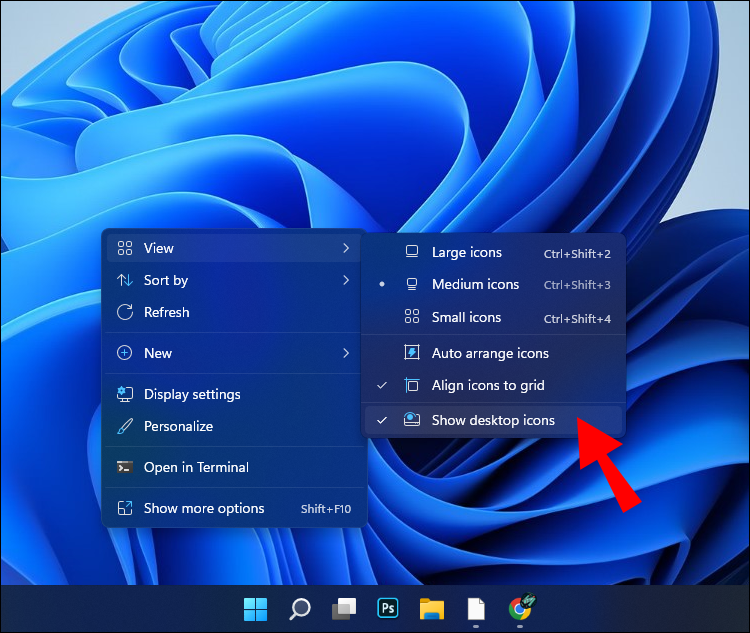
- Right-click an empty area of your desktop.
- Hover over View.
- Find Show desktop icons.
- Make sure the option is checked.
If it is unchecked, click it to enable desktop icons. This setting controls the visibility of all desktop icons, including This PC, Recycle Bin, and shortcuts.
9. How to Access This PC Without a Desktop Icon
Even if you don’t want to add This PC to the desktop, there are several ways to open it quickly.
1. Use Windows + E
Press Windows + E to open File Explorer.
You can then select This PC from the left navigation pane.
2. Use the Run Dialog
- Press Windows + R.
- Type:
shell:MyComputerFolder - Press Enter.
Windows will open This PC directly.
3. Use Windows Search
- Click the Search icon on the taskbar.
- Type This PC.
- Select the matching result.
This method is useful if you don’t remember the keyboard shortcuts or the Run command.
10. How to Fix This PC Icon Not Showing on Windows 11
If you followed the steps but the This PC icon still doesn’t appear, try the following troubleshooting methods.
1. Check Desktop Icon Settings
First, make sure the Computer option is enabled.
- Open Settings.
- Go to Personalization > Themes.
- Click Desktop icon settings.
- Check the Computer option.
- Click Apply and OK.
If it was already checked, uncheck it, apply the change, check it again, and apply once more.
2. Enable Show Desktop Icons
The desktop may be configured to hide all icons.
- Right-click the desktop.
- Select View.
- Enable Show desktop icons.
Check whether This PC appears afterwards.
3. Restart Windows Explorer
Windows Explorer manages the desktop and File Explorer. Restarting it can resolve temporary display problems.
- Press Ctrl + Shift + Esc to open Task Manager.
- Find Windows Explorer in the Processes list.
- Right-click it.
- Select Restart.
The taskbar and desktop may disappear briefly while Windows Explorer restarts. This is normal.
Check the desktop again once it returns.
4. Refresh the Desktop
Sometimes Windows does not immediately update the desktop after changing icon settings.
- Right-click an empty area of the desktop.
- Select Refresh.
- Wait a moment.
- Check whether This PC appears.
You can also press F5 while the desktop is active to refresh it.
5. Check Whether Tablet or Touch-Friendly Settings Affect Your Desktop
If you’re using a touch-enabled laptop or tablet, the desktop may have different display behaviour depending on the device and Windows configuration.
Check that you are viewing the normal Windows desktop and that desktop icons are enabled.
6. Restart Your Computer
If none of the previous methods works, restart Windows 11. A restart can resolve temporary problems with desktop rendering, Explorer, or system settings. After restarting, check Desktop Icon Settings again.
11. Remove the This PC Icon From the Windows 11 Desktop
If you later decide you no longer need the This PC icon, you can remove it without deleting your files or uninstalling anything.
Follow these steps:
- Right-click an empty area of the desktop.
- Select Personalise.
- Open Themes.
- Click Desktop icon settings.
- Uncheck Computer.
- Click Apply.
- Click OK.
The This PC icon will disappear from your desktop. This only hides the desktop icon. You can still access This PC through File Explorer or Windows Search. If you created a manual shortcut instead, right-click the shortcut and select Delete. Removing that shortcut does not delete your computer’s drives or files.