
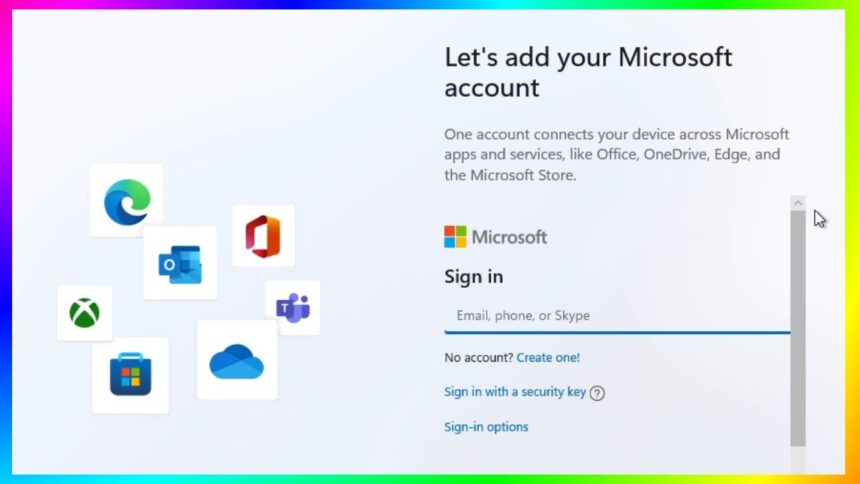
Windows 11 strongly encourages users to log in with a Microsoft account during the setup process. This allows the company to synchronise settings, personalise your experience, and connect your devices under one profile. However, not everyone wants to link their operating system to an online account. Whether for privacy, convenience, or practicality, there are legitimate reasons to prefer a local account.
Perhaps you’re setting up a computer for a child, preparing a system for sale or donation, or simply prefer not to share data with Microsoft’s ecosystem. Whatever your reason, there are reliable methods to install Windows 11 without signing in with a Microsoft account.
This guide covers everything you need to know – including updated methods that work for Windows 11 version 24H2 and newer preview builds (26100, 26200, and beyond). It also includes a detailed explanation of how to create a custom installation USB using Rufus, which automates the process.
Why You Might Want to Use a Local Account
Before diving into the steps, it’s worth understanding the benefits of using a local account instead of a Microsoft one:
- Privacy: Your data, preferences, and app activity are not synchronized to Microsoft’s servers.
- Offline Use: You can complete the setup without an internet connection, which is helpful for isolated systems.
- Data Security: If you’re donating or reselling a PC, a local account ensures no personal data remains accessible.
- Simplicity: You can manage the PC without dealing with Microsoft account recovery or login synchronisation.
Install Windows 11 Without a Microsoft Account (Builds – 24H2)
For Windows 11 version 24H2 and current release builds (till April 2025), the OOBE/BYPASSNRO method works effectively. It prevents the setup process from requiring an internet connection or Microsoft login.
Step-by-Step Instructions
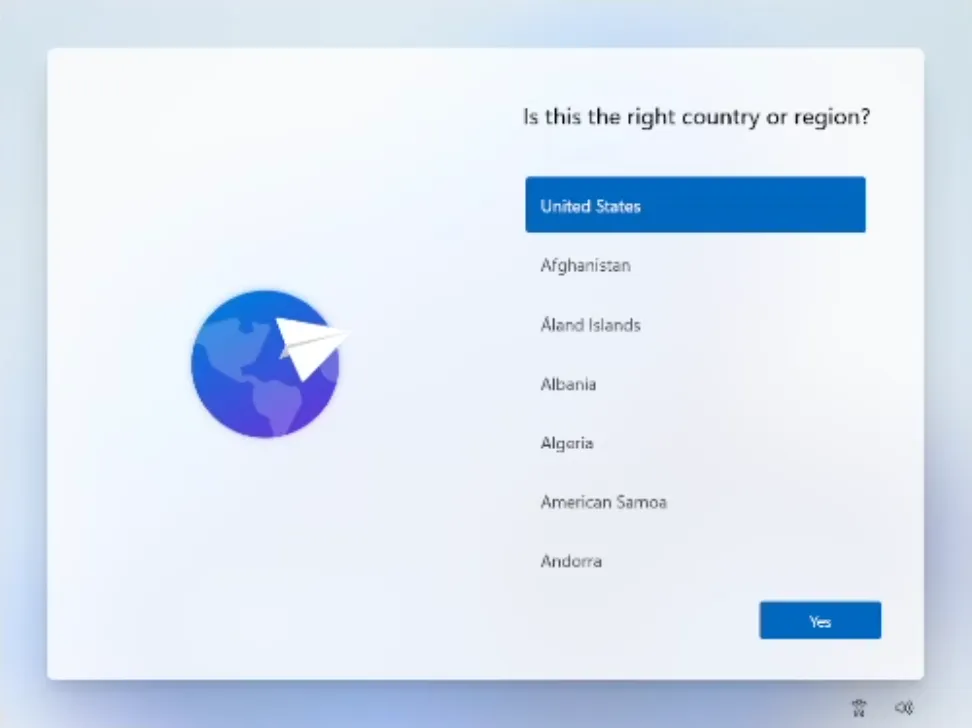
- Begin the setup as usual from your installation media. Proceed until you reach the “Choose your country” screen.
- Press Shift + F10 to launch the Command Prompt window.

- Type the following command and press Enter:
OOBE\BYPASSNROThe system will reboot automatically and return to the setup process. This command disables the requirement for an internet connection during the installation process.
Note: If you receive an error that the command is not recognized, proceed to the method for newer builds below.
- Once back on the country selection screen, press Shift + F10 again and type:
ipconfig /releaseThis disconnects your system from the internet. Alternatively, you can unplug your Ethernet cable or disable Wi-Fi manually.
- Close the Command Prompt and move forward through the regional and keyboard setup screens.
- When prompted with “Let’s connect you to a network”, select “I don’t have Internet.”
- On the following screen, choose “Continue with limited setup.”
- You’ll see a screen titled “Who’s going to use this device?” Enter the desired username and click Next.
- Set a password or leave the field blank if you prefer password-free access.
- Complete the remaining setup steps normally. You’ll now have a local-only Windows account.

For Future Builds (26100, 26200, and Later)
Starting with preview builds 26100 and newer, Microsoft has disabled the OOBE\BYPASSNRO command. Instead, a new method – start ms-cxh:localonly – is required.
Updated Steps
- Proceed through the Windows 11 installation until you reach the Sign-in screen.
- Press Shift + F10 to open the Command Prompt.
- Type the following command and hit Enter:
start ms-cxh:localonly - A dialog box titled “Create a user for this PC” will appear. Enter a local username and password (optional).
- Complete the remaining setup steps. Once done, you’ll be signed in to a local Windows account instead of a Microsoft one.
This method works identically for both clean installations and out-of-box setups on OEM devices.
Create a Custom Windows 11 USB Installer (Using Rufus)
If you frequently reinstall Windows or want a one-click offline setup, you can create an installation USB that automatically disables Microsoft account requirements.
What You’ll Need
- A USB flash drive (minimum 8 GB)
- The latest Windows 11 ISO file (downloadable from Microsoft’s official site)
- The Rufus utility (version 4.4 or later)
Steps to Create the Bootable USB
- Download Windows 11 ISO from the Official Website.
- Launch the tool (no installation required) and select your USB drive.
- Click “Select,” browse for the Windows 11 ISO file, and then open it.
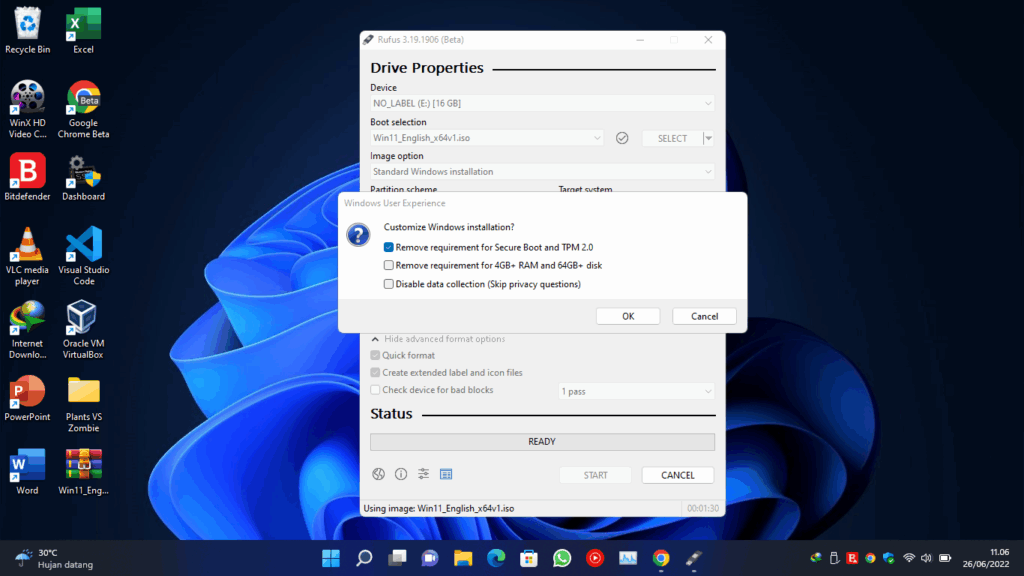
- Configure Rufus Settings
- Choose “Remove requirement for an online Microsoft account.”
- Optionally, enable “Create a local account with username” to predefine your local account.
- You can also toggle options to bypass TPM 2.0, Secure Boot, and RAM checks if necessary.
- Click Start. Rufus will warn you that all data on the USB drive will be erased. Confirm by selecting OK.
- The tool will copy and configure the files. Once finished, your USB drive will be ready for installation.
Installing with the Custom USB
- Boot from the Rufus-created USB drive.
- When you reach the regional setup screen, press Shift + F10 and type:
ipconfig /releaseThis ensures your PC is offline.
- Continue installation and choose “I don’t have Internet.”
- Select “Continue with limited setup.”
- Enter your username and password, then finish the installation.
The Rufus installer automatically disables online requirements, allowing the setup to proceed smoothly with a local account.
Microsoft continues to tighten the integration between Windows and its online ecosystem, but local accounts remain a viable choice for users who prioritise privacy or simplicity. While newer builds of Windows 11 have made bypassing the Microsoft login more complex, the methods above-particularly the Rufus installer-offer dependable workarounds.
If you’re configuring a family computer, a workbench PC, or a device you plan to give away, installing Windows 11 with a local-only account gives you complete control over your data and system setup. By following these steps carefully, you can ensure your installation stays private, secure, and entirely under your control.
- Rufus Alternatives For Windows 11
- How to Download Windows 10 ISO
- Create UEFI Bootable USB to Install Windows Server
- Install Windows 11 25H2


