
Have you ever recorded a video on your phone that looked sharp in your gallery but turned blurry after editing or uploading it to TikTok or Instagram Reels? Poor camera focus, low lighting, incorrect export settings, and platform compression can all affect video quality.
The good news is that you don’t always need to record the video again. Identifying the cause can help you improve the footage and avoid quality loss when publishing it.
In this guide, we’ll explain why mobile videos look blurry, how to improve their quality with AI video enhancers, and which recording and export settings to use for TikTok and Instagram Reels.
Why Do Your Mobile Videos Look Blurry on TikTok or Reels?
Before trying to fix a blurry video, you need to understand what caused the problem. In most cases, the issue comes from the camera, lighting conditions, editing process, or compression during upload.
Camera Focus, Movement, and Poor Lighting
If your video already looks blurry in your phone’s gallery, the problem probably started during recording.
Several factors can affect sharpness:
- Dirty camera lens: Fingerprints, dust, and smudges can make footage appear hazy.
- Incorrect focus: Your camera may focus on the background instead of your subject.
- Camera movement: Shaky footage can make details difficult to see.
- Low lighting: Cameras often increase sensitivity in dark environments, which can introduce noise and reduce fine detail.
- Motion blur: Longer exposure times in low light can make moving subjects appear blurry.
Low-light footage can be particularly difficult to repair because noise reduction may smooth out important textures and details.
Compression During Editing and Uploading
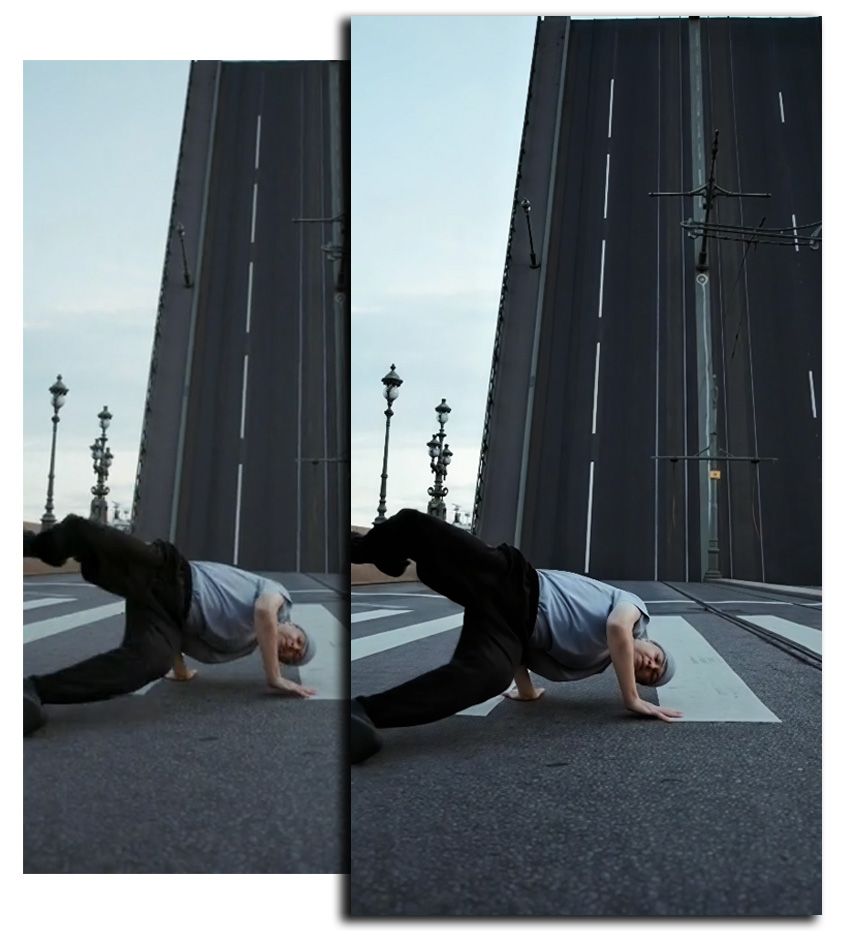
If your video looks sharp in your gallery but becomes blurry after uploading, compression could be responsible.
TikTok and Instagram process uploaded videos to make playback more efficient across different devices and internet connections. This process can reduce image quality, particularly when the original file is already heavily compressed.
Repeatedly exporting and re-uploading the same video can make the problem worse.
What to Check Before Recording or Editing a Video
Prevention is usually easier than repairing blurry footage. A few adjustments to your camera settings and recording environment can make a noticeable difference.
Check Your Camera Settings
Open your smartphone’s camera settings and review the available video recording options.
For most TikTok videos and Instagram Reels, the following settings are a good starting point:
- 1080p: Suitable for most vertical social media videos.
- 4K: Useful when you plan to crop, reframe, or stabilize footage during editing.
- 30 FPS: A practical frame rate for everyday videos.
- 60 FPS: Better suited to fast-moving subjects, provided you have enough light.
Recording at a higher frame rate does not automatically improve quality. In low-light conditions, 60 FPS footage can sometimes look worse than footage recorded at 30 FPS.
Choose settings based on the type of content you’re creating and the lighting available.
Improve Lighting and Keep Your Phone Stable
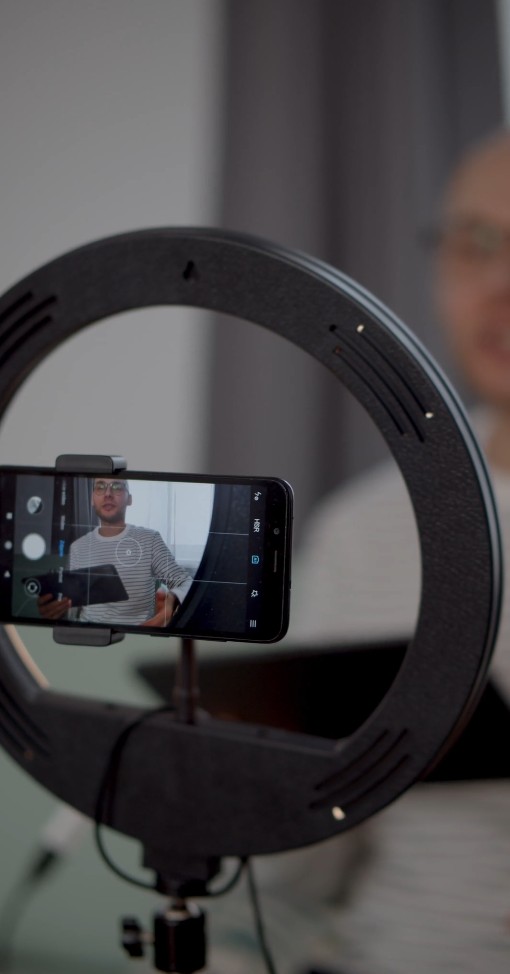
Lighting and stability have a major impact on video sharpness.
Before recording:
- Clean your smartphone’s camera lens.
- Tap the screen to focus on your main subject.
- Avoid digital zoom whenever possible.
- Record in a well-lit environment.
- Use a tripod or phone stand to reduce camera shake.
- Record a short test clip and check its sharpness before filming the entire video.
Natural lighting can work well for everyday content. If you’re recording indoors, position your subject near a window or use a suitable video light.
Always Edit the Original Video File
Avoid editing a copy that has been compressed by a messaging app or social media platform.
For the best results, transfer the original recording directly from your phone to your editing software. Keep a backup of the original file before making changes or exporting the finished video.
This gives you a clean source to work with if you need to edit or enhance the footage again.
How to Improve Blurry Mobile Videos Using AI
If your video already contains noise, softness, or compression artefacts, an AI-powered video enhancer may help improve its appearance.
One option is to use AI tools to Improve Video Quality, which offer different enhancement modes for specific types of footage. Its available options include Lowlight for dark scenes, Portrait for faces, and Product for product-focused videos.
The best approach is to identify the main problem first and choose an enhancement mode that matches your footage.
1. Select the Video You Want to Improve
Start with the original video saved on your phone or computer.
Play a few seconds and look for common quality problems, such as:
- Pixelation and visible compression artefacts
- Noise in dark areas
- Soft or unclear edges
- Poor facial details
- General loss of sharpness
These problems are not identical, so they may require different adjustments.
If the video looks clear in your gallery but blurry after publishing, check your export and upload settings first. AI enhancement may not be necessary.
2. Upload Your Video to an AI Enhancement Tool
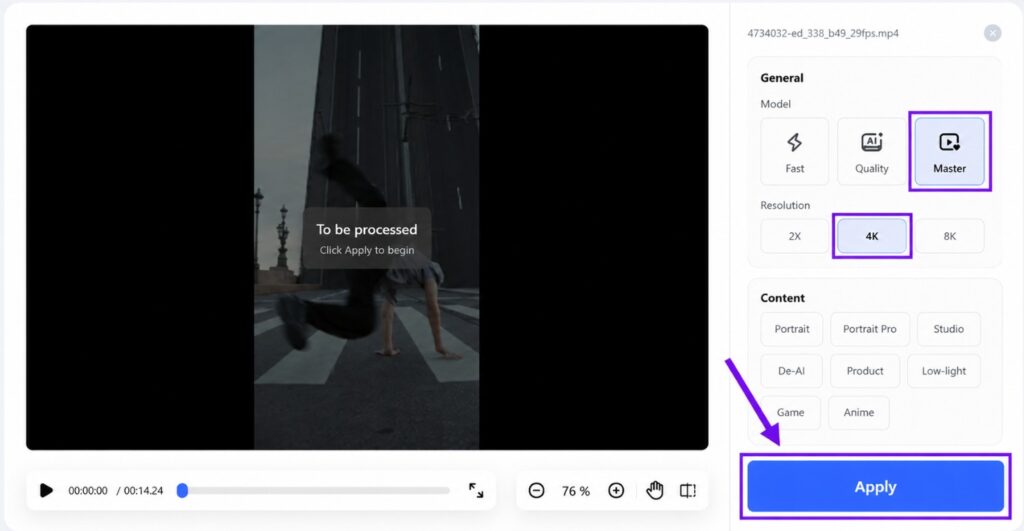
Open your preferred video enhancer and upload the original recording.
Wait for the tool to process the file and generate a preview. Before making changes, keep a separate copy of the original video so you can compare the results.
3. Choose the Right Enhancement Mode
Select an enhancement option based on the main issue affecting your footage.
- Blurry footage: Try a general enhancement mode designed to improve clarity and reconstruct missing details.
- Dark scenes: Use Lowlight mode to improve the appearance of footage shot in low light.
- Pixelated videos: Try resolution enhancement or compression artefact reduction, if available.
- Unclear faces: Use Portrait mode to improve facial details without making skin look unnaturally sharp.
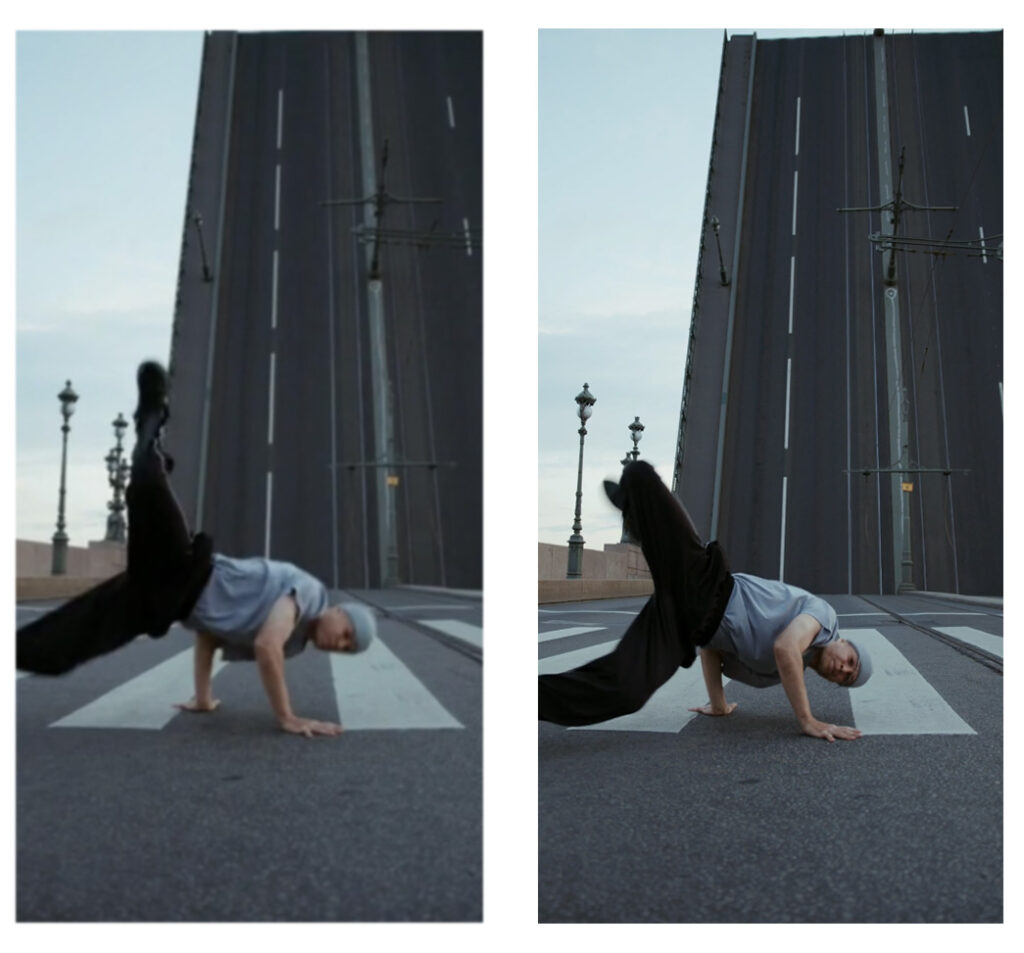
AI enhancement tools estimate or reconstruct details that may not exist clearly in the original recording. As a result, they can sometimes introduce artificial textures or make certain areas look unnatural.
Always compare the enhanced version with the original before downloading it.
4. Compare the Results Before Downloading
Review the enhanced footage alongside the original video. Do not judge the result based only on a single frame. Play the same section of both videos and pay attention to:
- Eyes and facial details
- Hair and clothing textures
- Small text and background objects
- Moving subjects
- Edges around people and objects
Watch for artificial sharpening, flickering, halos, and overly smooth faces. If the result looks unnatural, try another enhancement setting or reduce the processing intensity.
Once you’re satisfied, download the improved video. Check that the audio remains synchronised and that the original framing has not changed unexpectedly.
How to Export Videos for TikTok and Instagram Reels Without Losing Quality
Even a sharp recording can look poor after editing if you use the wrong export settings. For most vertical social media videos, these settings provide a reliable starting point.
Use the Correct Resolution and Video Format
| Setting | Recommended option |
|---|---|
| Aspect ratio | 9:16 |
| Resolution | 1080 × 1920 pixels |
| File format | MP4 |
| Video codec | H.264 |
| Frame rate | 30 FPS or original 60 FPS |
| Compression | High-quality export with a suitable bitrate |
Avoid reducing the bitrate too much, as aggressive compression can remove fine details and create visible artefacts.
You also don’t need to export every video in 4K. A properly exported 1080 × 1920 video is suitable for most vertical social media content.
Check Video Quality Before Publishing
Before uploading your video, play the exported file directly on your smartphone.
Make sure the footage looks sharp, the audio is synchronized, and the video has not been cropped incorrectly.
You should also review the upload settings on your social media apps:
On TikTok:
- Look for the option to upload videos in higher quality, if available.
- Disable Data Saver if it is affecting playback quality.
- Use a stable internet connection when uploading.
On Instagram:
- Check the Media Quality or Data Usage settings.
- Enable the option to upload at the highest available quality, if your app version provides it.
- Avoid judging the final result while the platform is still processing the upload.
App settings and menu names can change with updates, so check the current options available on your device.
Can a blurry video be fixed after recording?
Yes, depending on the cause. AI video enhancers can improve noise, compression artifacts, and some types of softness. However, they cannot reliably recover details completely lost because of severe focus problems or motion blur.
Does uploading a video in 4K guarantee better quality?
No. Recording and exporting in 4K can preserve more detail and provide flexibility when editing, but it does not guarantee a sharper result after uploading. The original footage, export settings, and platform compression all affect the final quality.
Why does my video look clear in my gallery but blurry on Instagram?
Instagram may compress your video during upload. Other possible causes include Data Saver settings, an exported file with a low bitrate, or incomplete processing after publishing. Check the original and exported files before changing your camera settings.
Should I use 30 FPS or 60 FPS for TikTok and Reels?
Use 30 FPS for most everyday videos. Choose 60 FPS when recording fast movement or when you plan to create smooth slow-motion footage. Make sure your lighting is sufficient, as higher frame rates can be less forgiving in dark environments.
Blurry videos on TikTok and Instagram Reels are not always caused by social media compression. Camera focus, poor lighting, movement, and incorrect export settings can all affect the final result.
Start by checking your original recording and editing workflow. Use the correct resolution, maintain a suitable bitrate, and avoid unnecessary compression. If the footage still needs improvement, an AI video enhancer can help, provided you review the results carefully.
With a few changes to your recording and export process, you can publish sharper videos without having to reshoot every clip.