
Recording your iPhone screen is pretty easy if you want to capture what’s happening in apps, games, or other cool stuff on your iPhone. Even though it’s built into the iPhone, some people might have trouble finding it in the settings.
Unlike some Android phones that have it in the system, you’ll need to turn it on in your iPhone settings to use it in Control Center. Once it’s set up, you can start recording your screen. Check out our simple step-by-step guide below to see how to turn on the Screen Recorder on your iPhone.
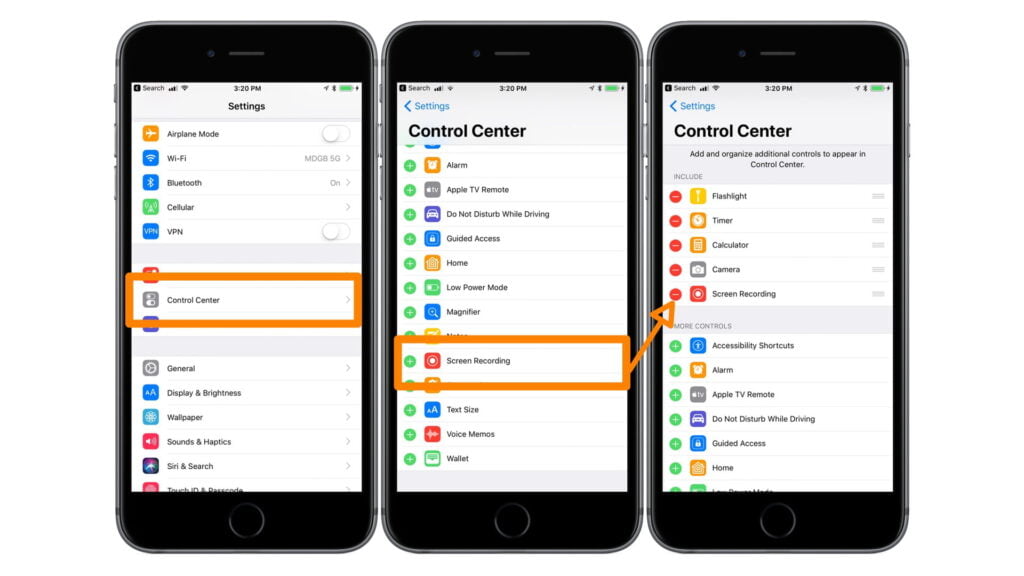
- Go to the iPhone Settings app. Then go to “Control Center”;
- Scroll down the screen and tap the “+” button under “Screen Recording”;
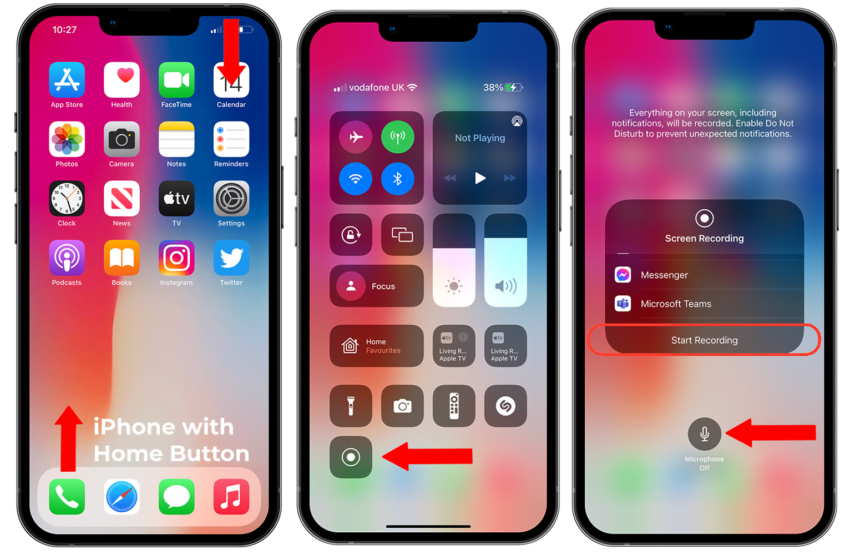
- Open the Notification Center. On models with a Home button, drag your finger from the bottom to the top of the screen. With Face ID, drag your finger across the screen in the top right corner from top to bottom;
- Select the “Screen Recording” icon.
- If you want to stop capturing, open Control Center again and tap the Screen Recorder icon, or select the red border around the clock (at the top of the screen) and select the “Stop” option.
Now! To watch the recorded video, open the Photos app and look for the screen recording. Like any other video, you can edit and share it with your friends.
Remember that some apps, like Netflix and other video streaming services, may not allow recording due to privacy and security concerns to prevent piracy. Unfortunately, there’s not much you can do about it.
How to record iPhone screen with audio
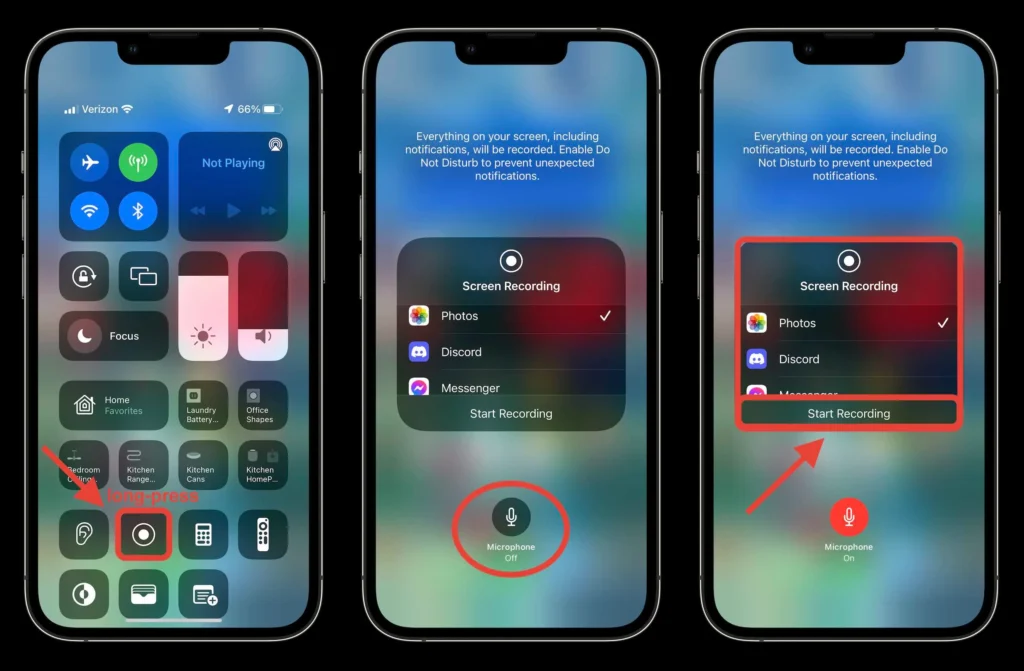
If you’re looking to record your iPhone screen with audio input, like for a walkthrough or video tutorial, it’s easy to do. Follow the steps mentioned earlier, and your phone’s audio will be recorded simultaneously without extra tools.
But there’s a catch – you won’t be able to capture external audio this way. To share your screen with microphone capture, you must upgrade to iOS 15 and use FaceTime’s SharePlay feature.


